So you want to be a rifleman and your range only goes to 100 yards? Been there. For a while, I lived too far away from ranges longer than 200 yards to get any real intermediate range practice. Are you in the same boat? There is a specific tool to assist you in your quest to become a rifleman: The E2 Reduced Silhouette. Reduced range targets such as the E2 are free, printable at home, and can help keep you sharp when your access to longer ranges is limited. Let’s get started:
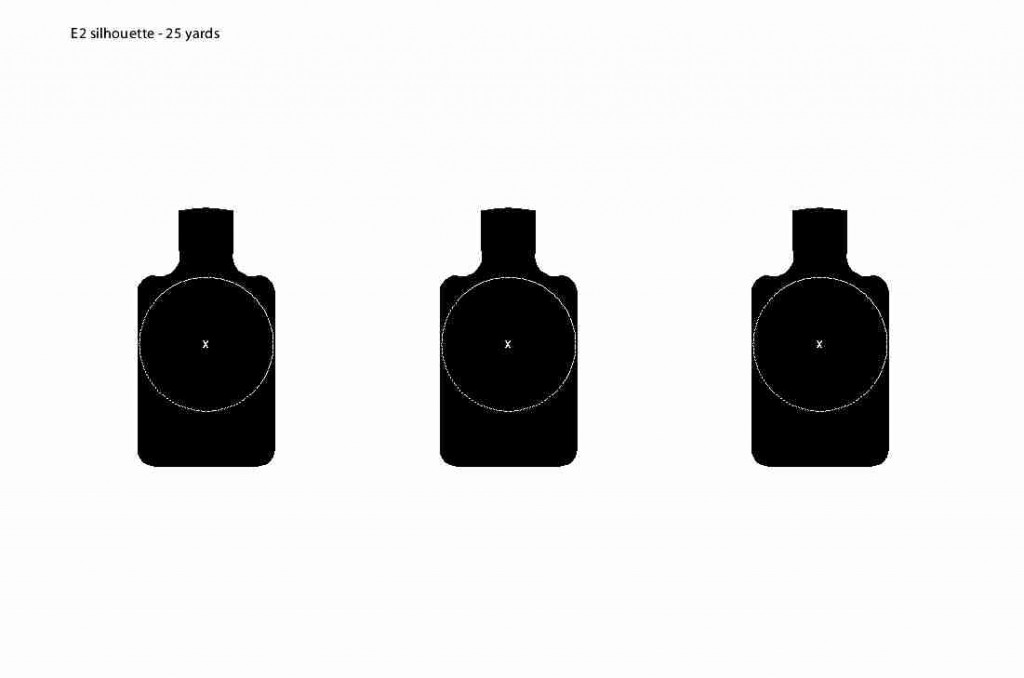
The 25 Yard / Meter Reduced E2 Silhouette.

The E2 silhouette represents a 300 meter target and can be found for 25 yards, 25 meters, and 50 yards as a reduced range target.
The E2 silhouette can give you a decent starting point for your long range shooting. When used properly, it will help you master your body structure, breathing, trigger control, and mental focus. It can be used with irons, optics, or red dots. When implemented along with a 100 yard target, you can give yourself a decent close range and far practice session for very little energy. One of the deficits of this target is that it does not teach you to combat the wind. So how do you integrate the E2 Silhouette into a range session?
For Shooters Running Red Dots:
Using the 25 yard / meter E2 reduced is an effective tool for shooters running red dots. In my article “the chest, the head, and the hat“, we discussed shooting out to 400 yards with a red dot utilizing a 50 yard zero and three holdover reference points. With your red dot sighted in at 50 yards, we can use the same holds I discussed in the above article to practice on this reduced silhouette. In this case, with a 25 yard reduced E2 representing a 300 yard target, we would hold the dot on the “face” to hit near the center of mass.

Red dot sights are more useful if you know your bullet drops. I found it *much* easier to hit a human silhouette target at 300 and 400 yards with a RDS vs irons.
The trajectory of your 50 yard zero brings the bullet about 1.3-1.5 inches low at 25 yards, ergo it is necessary to aim higher… in this case holding the dot on the face of the reduced target… which is the same hold you would actually use shooting at a silhouette at 300 yards with a 50 yard zero. NEAT. If it doesn’t match perfect with the dead center of the E2 silhouette, that’s ok. Your individual setup may put you low on the target, but the quality of your grouping would be a good indicator of your capabilities out to 300 yards.
For Shooters Running Optics:

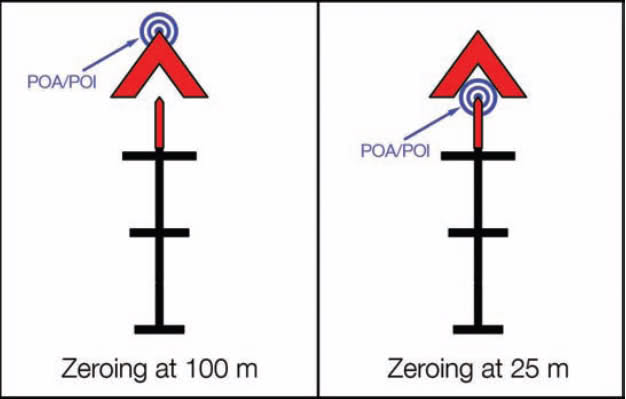
Shooting a carbine with an ACOG set up for 62 grain ammo? This setup will work well for the E2 reduced so long as your BDC matches your load. The red tip below the chevron represents the 300 meter aiming point.
If you are running a optic which has a built in BDC, you can still use the E2 reduced. Due to the many possible combination of guns and optic BDC calibrations, you may need to shoot this once to see if the 300 meter marking corresponds with the 25 yard target. If you are shooting a carbine with, say an ACOG calibrated for a rifle… well then things might not work as well. It’s still good practice. I mentioned the ACOG, but this will work with any optic where you have matched the reticle calibration to your gun / load.
- For 14.5-16 inch carbines with a optic which is calibrated for carbine velocities: you are in luck as your point of aim on the E2 reduced should be your 300 meter reference mark on your BDC.
- For a 18-20 inch rifle with an optic calibrated for rifle velocities: then you will be shooting slightly low on the E2 reduced. Possibly below it.
I shoot a rifle length system with a ACOG. I wouldn’t re-zero my optic for the E2 reduced, so the best indicator of how well your shooting will be a tight cluster of shots low or below the silhouette. When you actually hit the 300 yard range where your BDC actually matches your POA / POI then you will find yourself shooting those tight groupings at the real distances. Some optics are calibrated as an average of velocity between the rifle and carbines, so if things don’t match exactly, that’s fine. Go for a small, consistent group.
If you have a simple duplex reticle or something other than a BDC setup, I would run a 50 yard zero, and aim at the face just like the red dot model discussed above.
For Shooters Running Irons:
If you are running a full length flat top rifle, set the drum to the Z marking for a 25 yard / meter zero. Otherwise, see the bullet points below.
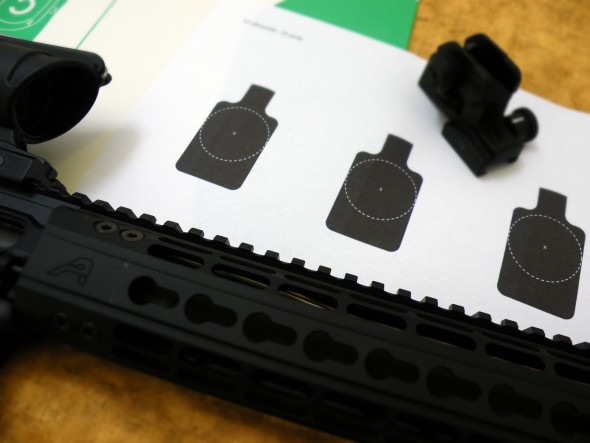
The irons are another area where our sight picture will give us a realistic reference when using the E2 reduced. There are a few adjustments that need to be made, and flip up sights just won’t cut the mustard. You need a drum (or other) adjustable rear sight to take advantage of the 25 yard E2 Silhouette. Different guns with different velocities will yield very slight differences in point of impact, so you may need to adjust up or down to bring your shots on to the silhouette. You will utilize the small aperture for each platform!
- For 14.5-16 inch flat top carbines: Keep your elevation wheel on the 6/3 mark and fire at your E2 reduced. You should be on target for 14.5 inch rifles and may need to go one click up for your 16 inch rifles. Mark your setting for future practice.
- For 20 inch flat top rifles: Adjust your elevation wheel to the Z mark on the drum. This is a zero mark for rifle length systems firing 62 grain ammo, but should work well for 55 grain ammo too.
- For 20 inch fixed carry handle rifles: A2 rifles are typically 1 MOA per click adjustments. Adjust your elevation wheel one click past the 6/3 marking.
Wrapping Up:
So the E2 represents a practical way to achieve longer distance rifle training from the comfort of your 100 yard range. While it isn’t a perfect substitute, it’s a fantastic representation of a distant target and a practical means of applying the fundamentals and managing your sight picture. So you need the files? Well… here you go.
* Credit to MOLON of AR15.com for the original creation of the E2 Silhouette


<>
That’s the sound of lothaen hitting the ball out of the park with this entry!
PS – on my 20″ rifle, using an ACOG (TA31-F – calibrated for a carbine)at 25 m yields a point of impact almost a third of the way down from the 300-m point to the 400-m hash mark. It’s also the exact point where the post turns from red to black. I bet it corresponds to the “Z” setting on irons…
I appreciate the input. My goal is to educate shooters, and to give them the tools they need to use their rifles to the fullest extent of their capabilities. Just wait until I get my GoPros. That’s plural.
Any ideas for those of us who use state DNR ranges that don’t allow silhouettes?
@Jack Bohm: Some (very light) DIY work is in order. Start by figuring out your target size that you’d like to hit. Are you looking to hit an 8” circle @ 300yds? 6”? Choose the size based on the valid hit area on the hunting game/target that you’d like to be able to shoot at and hit consistently. Then choose the distance you’d like to actually place the target. For our sake, let’s say it’s 25yds. (The math works out the same for yards or meters. You’ll need some slight adjustments if you want to hit a target at 300 *yds* but are shooting on a range that’s 25 *m*, but if that’s the case the math is probably already second nature for you.)
Target size x (range distance / real-world distance) = reduced target size
…so now what? Now, it’s time for Photoshop, PowerPoint, or whatever other tool you have that draws circles at specific sizes. (If that’s all garbeldygook then ask a friend, neighbor, or grandkid to help.) Open up a new doc and make it the same size as your paper. (You also want this to be at least 150 pixels per inch, but no more than 300, if that’s an option. If not, don’t worry.)
Now you draw one or more circles on the page that are each exactly the size of your reduced target size. (Pro tip: once you have one, just copy/paste a few more instead of sizing each new one by hand.) Leave some space between them, but feel free to put at least a few on the page.
Save the file in whatever format the app likes. This let’s you go back and make changes or new versions super easy in the future. Then export a copy as pdf. Open the file in your fave pdf reader and print full-size, not “fit to page.” ….and voila, you’ve got a non-silhouette target (meaningless to the authorities who are scared, but very meaningful in size to you) properly reduced to whatever range you’re going to shoot at.
So, using the examples above, if you wanted to hit a 6” target at 300 yds but your range is 25 yds, then the math would be:
6 x (25/300) = .5”
…so you’d make half-inch circles to place on the page and shooting them at 25 yds would be the same as shooting 6” targets at 300 yds. Yes, those are teeny, tiny circles for a .223” projectile to be *inside* of. (If the center of the bullet isn’t inside the actual circle then you missed the target at 300 yds!) …but a 6” circle is also a teeny, tiny target to hit at 300 yards. And that’s why (aside from also dealing with wind and environmental factors) hunting at those ranges is so challenging. If that all seems unreasonable might I humbly suggest that an Appleseed is in order to learn to shoot out to 500 yards?
“…but I already have a 100yd (or other distance) target that’s a shape I like and want to shoot it on the short 25yd range near me, instead.” No problem! See that part in the formula that’s (range distance/real-world distance)? We’re going to multiply that by 100 and then you’re going to photocopy the target but reduce it by that percentage. (All copiers will let you reduce and enlarge images by specific percentages, but you might have to dig through the menu a bit to find it.)
Bonus range tip: so you have your target reduced for 25yds, but want to push it out even farther? Shoot it at 50yds to simulate double the distance. (Yes, the math works. Try some examples using the formula above to see for yourself.)