Defensive application of the A2 iron sights needs a bit of discussion. You can read tons of theory on how to adjust irons for an improved battle sight zero, why a dead hold is better than a 6 o’clock hold, and why you should ditch the irons for x, y, or z. etc. While irons have been eclipsed by technology, a well practiced shooter can rock the irons with speed and precision, but it takes more practice. After working with irons nearly exclusively for the last year, here is what I found that worked well:
Indoors and Low Light:
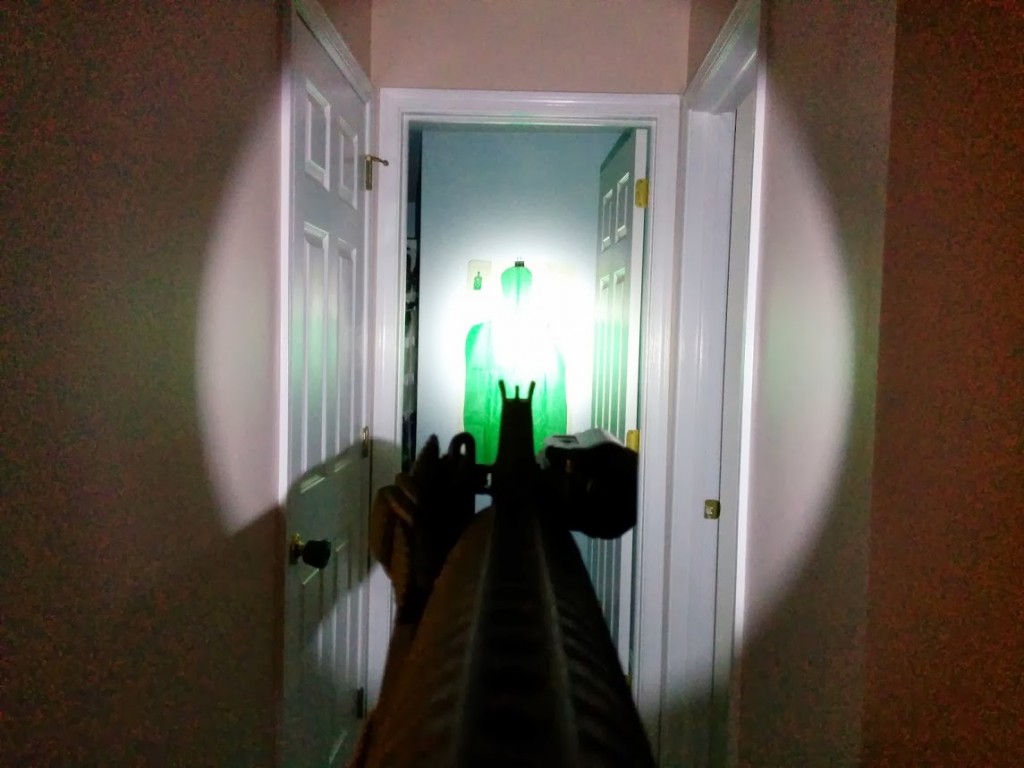
Aim over the rear sight, ignoring it completely, at bad breath distances.
If you are grabbing a weapon with irons for home defense… well, irons are fast with the right technique, but you are going to need a light. When used with a bright weapon light, iron sights turn into a great big shadow that’s quickly picked up by the eye. Aiming over (and not using) the rear sight gives you a fast, gross motor movement with a broad aiming reference to use when speed is of the essence.
Bring weapon to low ready, activate the light and ID the target. Threat? Yes: front sight tower on target, fire – fire – fire!
Peering over the rear sight gives the eye one less thing to align and focus through, and simplifies close range shooting by giving you one reference point (the front sight) for aiming. Aim at or below center of mass, and expect to aim well below the head to get a head-shot with this hold. A head-shot at these ranges would not be my first choice, being that it’s a smaller target and all. Bullet rise will be significant outside of indoor spaces, so this technique is for speed up close. When the target is outside of indoor spaces, we need to utilize our sights. Let’s take a look at two popular holds.
The Dead Hold vs. 6 O’clock:
I have sighted using both the dead hold, and the 6 o’clock. Each has its advantages, but when discussing defensive shooting or a practical shooting competition, the 6 o’clock works better when target size decreases.
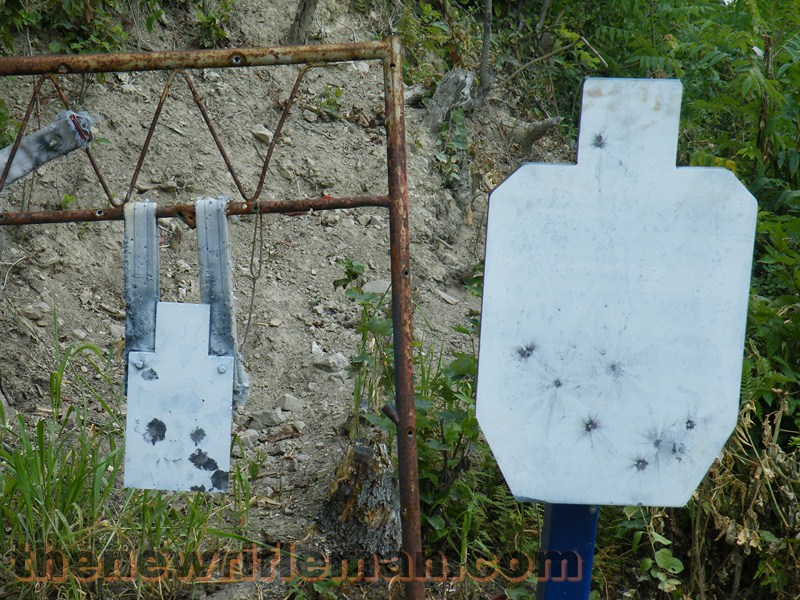
These guys are painted white, and at 400 and 500 yards, they become mighty hard to see. Don’t obscure them with a dead hold.
As some of you know, the dead hold (or center hold) is where the front sight “cuts” the target in half and rounds impact on that plane, while the 6 o’clock hold places the front sight slightly under the intended point of impact. Think of the 6 o’clock hold as the lower case letter i. Where you dot the i is where your bullet will impact.
At close ranges, a dead hold vs 6 won’t matter so much, but when you shrink the size of the target to something like a headshot at 100 yards, a dead hold (with a 100 yard zero) would obscure half the head. I prefer to go up 1 MOA on from a dead hold to turn it into a 6 o’clock, with a 100 or even with a 50/200 yard zero. This obscures less of the target and imagining the front sight as a lower case i where the dot is the point of impact isn’t difficult. My initial zero is mechanically raised 1 MOA with the front sight post. As you increase the distance, it is even more important to keep your hold at a 6 o’clock.
A target at 400 yards and out gets pretty dang small. Obscuring half the target makes it too difficult to engage. Work your setup at known ranges to adjust your elevation drum to keep your shots on a 6 o’clock hold. At extended ranges, I use a 6 o’clock hold at the belt-line of the silhouette so the torso remains un-obscured. Keep in mind that your elevation drum markings are in meters while your range may be in yard so work your holds on paper and mark your sights. The drum markings will get you close enough for hits, so make any minute adjustments needed and mark the drum for your holds at your known ranges.
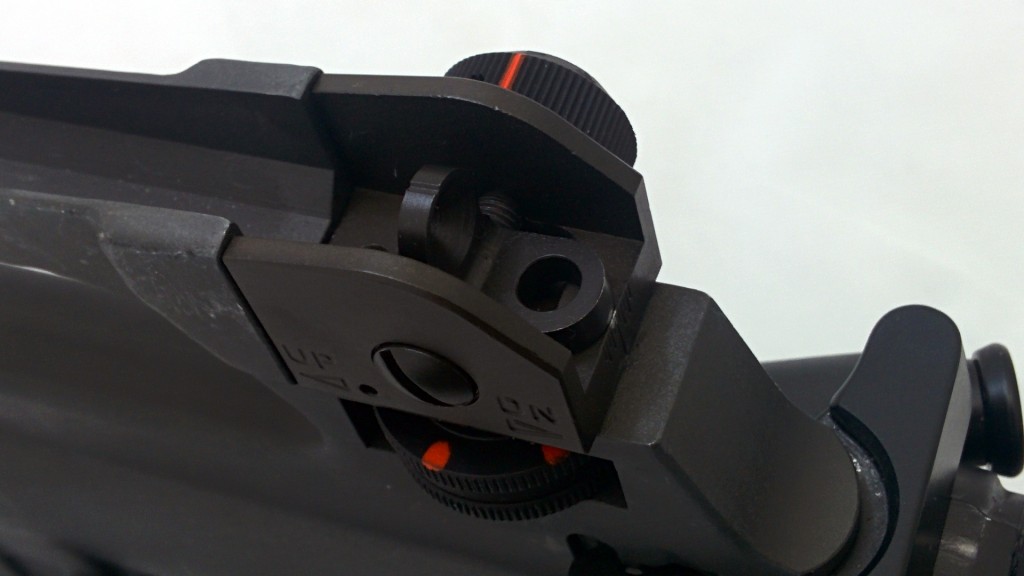
Mark your elevation drum and windage for a hold that works well for you. Once you have established a repeatable hold, you can end the guesswork. Fine tune your BDC to your loading.
A dead hold is useful for pure precision work, but quite impractical for shooting at man-sized targets at extended distances. Dot the I, in my opinion.
Large vs Small Aperture

Low Light? Large Aperture.
During daylight, at extended ranges, I find that the small aperture is just as fast as the large aperture. The nose to charging handle coupled with muscle memory place the sight exactly in line with my dominant eye. I don’t use the large aperture much, but at night the large aperture is essential for shooting in low light. If you are shooting past close range in dim conditions, the large aperture allows your eye enough light to successfully see and hit a dim target. Flipping to the small aperture at night blocks a good deal of light from getting to your eye… your pupil is starving for light and is wide open, but when you peer through that little hole you have really diminished the light that is going to reach your photo-receptors. So keep the large up for low light… you don’t have any business using the small aperture to shoot at things you can barely see anyway.
Sight Usage on an As Needed Basis:
One of the wisest things I ever read on weapon sights is that we escalate the use of our sighting system on an as needed basis. For example, if someone was an arm’s length away, we should train to fire upon that target without using sights which emphasizes pure speed. If they are a room away, we go to the (in the case of the irons) just the front sight post, ignoring the rear sight; we lose a little speed and pick up a bit of precision. At extended ranges, our focus shifts to fully utilizing the sight to ensure a hit on target, sacrificing even more speed for increasing the chance of a first round hit on target.
This method of escalation lends itself very well to those who are still using iron sights. A rifle with irons is not useless, it just requires more understanding of the system and more directed self-study to find what speeds you up on target. Irons are just another flavor of sighting system, with both waning understanding and popularity. If you train hard with them, they can serve you well, but don’t talk yourself out of moving forward with more modern sighting systems. Modern sighting systems have many advantages over irons, but fully understanding your iron sights (and their limitations) is never a bad thing.




good points, but there are a few things that you may not have thought about, or will go into at a later point. While the irons can be seen with a weapon light just fine. There are some other bi problems with the irons sights. such as being in a position that does not allow for proper cheek weld. Of course batteries on weapon lights do not last as long as the batteries in a aimpoint etc. Without that weapon light, the irons are useless. while you should not be shooting at a target you can’t ID. sometimes the combination or where you and the target are, allows target ID but not light where you are. People with less than decent eyesight and positions of the body or fate of how lights and shadows fall and the whims of the electronics of a weapon light make all that iffy. One can say ” oh that never happens often” but I would submit, neither does home invasions. If we all know when or where and under what conditions something will happen, then why even have a gun. The iron sight is fun and absolutely useable. but the thing about these articles are while they are great and you are right, many people see this as proof a RDS is just “tacticool” or some other such brain dead bullshit, and deprive themselves of the far superior fighting tool
Your right, my intention is not to make people believe irons are superior to modern optics, but are useable if that’s all you have or you are too stubborn to move on to a red dot / magnified optic. I added a bit at the end to reflect this. This shouldn’t be seen as evidence of their superiority, as all these techniques are compromises to make up for their deficiencies. Modern optics have really eliminated some of the deficiencies of irons: the acog has a BDC built in thats much faster than a drum, a red dot doesn’t obscure the target when your holding over at extended ranges, variables can play a dual role optic, etc are all true advantages. Anyone out there in reader-land should know these techniques with irons, but move on to modern sighting systems when possible.
Ah, the seemingly eternal “debate” over irons or optics…
Here’s a novel idea, use either reflex, magnified optics or irons in those situations where they’ll offer the best advantage. Or even stop thinking of irons as backup sights, but rather, think of them as auxiliary sights or, better yet, even complimentary sights that can be used together with optics, particularly, RDS sights in unique ways for the same aiming solution.
My AR15 has elevation and windage adjustable irons and an RDS in absolute co-witness, both zeroed at 300m which gives a MPBR of nearly 378m with a pipe of about 12″ with M192 ball FMJ.
If I want the sights to simulate bottom third I just dial up the elevation tower to 600m and the front sight is completely out of the way, or, I just fold down the rear sight and change my cheek weld.
If I want to shoot a point target rather than just use MBPR then across all ranges up to 600m I’ll turn off the RDS and use the irons along with good range finding and adjust for elevation and windage.
If I find myself in low light or extremely bright shooting conditions where the front sight is hard to see or shadowed but I still need to shoot a point target I’ll fold the irons up into play, adjust the elevation to either 200m or 300m and turn on the RDS. This puts a red dot on the front sight blade either just below the tip of the blade or just atop it (200m or 300m adjustment, respectively). And, it helps center the front blade in the rear aperture.
So, the two sighting systems can be used to compliment one another.
Oh, I only used magnified optics for range finding as the quality equipment out there costs more than my rifle, an additional cost I find at cross-purposes to my use of the rifle for SD, HD and SHTF.
LF