


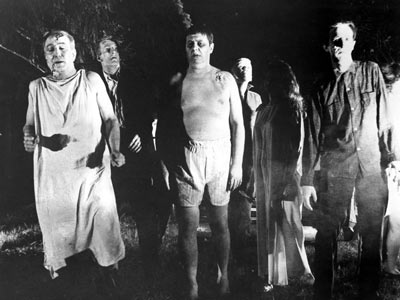
Variables are the general purpose optic of choice. Affordable, familiar, and versatile… modern 1-4/6/8x variables have become the do all optic of choice. These optics can be used at point blank out to 600 yards with a roll of the cat-tail. While we are plenty familiar with their use in the daytime, not enough of us have experience with them in low light. Not all of us have NVG’s, though most of us do have a variable of some type or another ready to roll. There are certain considerations you should take when shopping for a variable. Not all of them are well suited to the dark, and many of them will give up your position when you switch on the power. It’s best you learn the inn’s and out’s now before you are called to engage Zed and Federal Extermination Squads in varied and complex lighting conditions.
Optics and Low Light: Reticle and Illumination Choice
My first thoughts on this are… that there are many crappy reticles on the market designed without much thought to contrast. What does a self defense rifle do? It shoots targets in all lighting conditions and under stress of time. Running in low light is a difficult proposition for a variable if it has a teeny reticle that doesn’t catch the eye. Many manufacturers like to equip a small reticle that makes the optic feel more like a red dot when the power is on. Ok concept in the day, but at night… The problem with that concept is two fold:
- When running in the dark, the shooter will typically run the illumination at a lower setting. This means that if you have to light up your weapon light, the tiny red dot like reticle may wash out.
- If you run the on-board illumination too high, many optics spill light out the front giving away your position. These are typically optics with full reticle illumination.

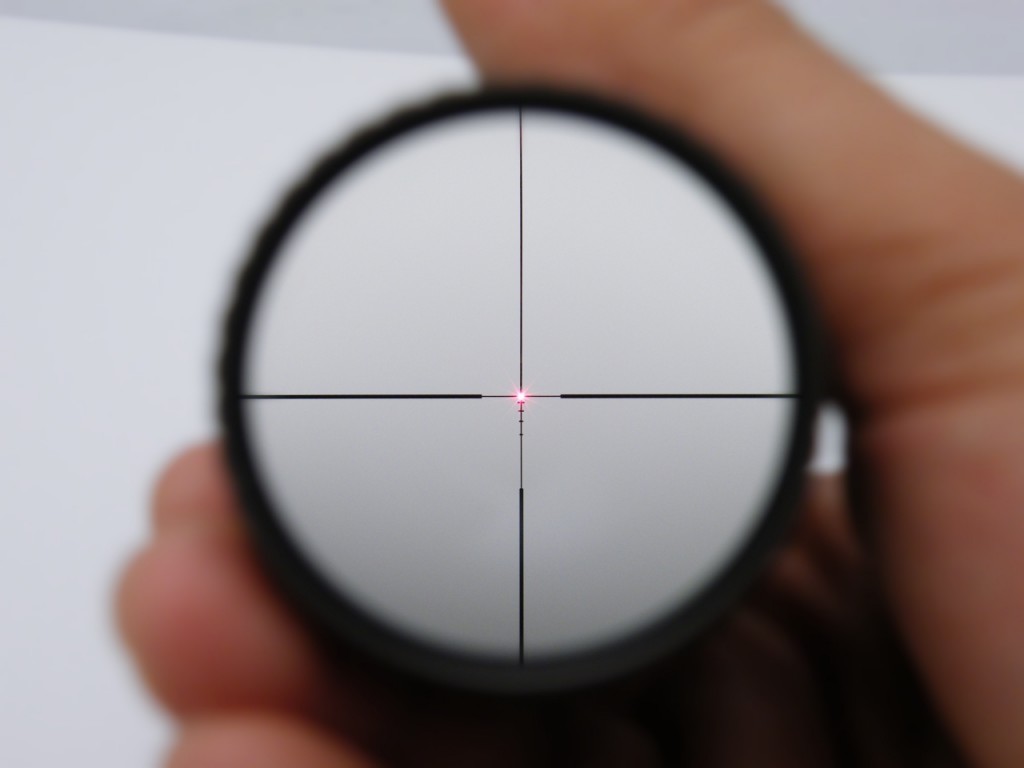
The 1st reticle is all around a poor choice for shooting in darker environments or in the woods. If the battery dies you have a small black speck to grab the eye, and if you light up your weapon light the reticle can easily be lost. I improved the reticle by incorporating a overbearing German #4 styling. Now you wont lose that reticle in any lighting condition except pitch black!
For more reading on reticle choice in dark environments, see my prior article “Why the German #4 Still Rocks!” The mentioned article has many more examples of me “fixing” reticles precisely for low light situations. In a nutshell, you want to find reticles that are reminiscent of the German #4 because those big sidebars are your backup if your illumination fails. With sidebars, your eye is still lead to center the target in the reticle. Without sidebars… your left working out the center with a small, black point of reference that doesn’t immediately catch the eye.
I’m Bleeding!
Another consideration is light bleed or light spill. Have you ever considered that your optic may be giving away your location every time you switch it on?
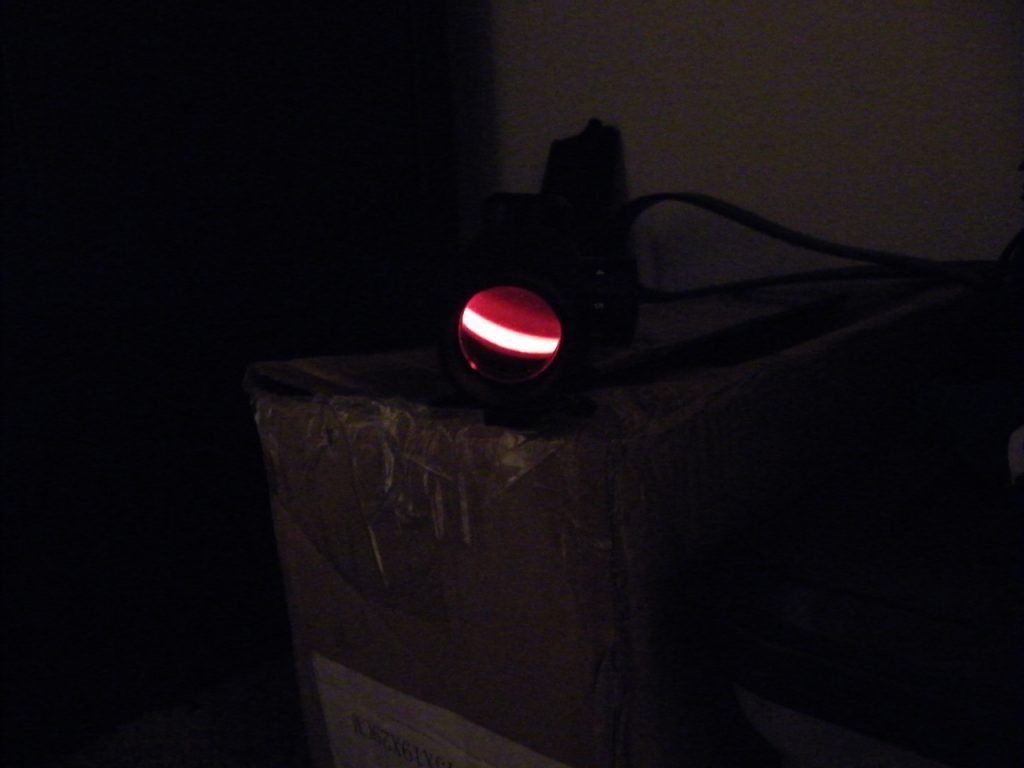
Check your objective! Many scopes which illuminate the whole reticle experience some degree of light bleed out the objective. If your opponent has NVGs, your variable will light you up like a beacon regardless of how low you run the settings.
Variable Optics with full reticle illumination typically tend to spill some light out the front of the optic. This means that if you want to stay hidden, AND SEE YOUR RETICLE, you need to run it at a low power setting and let your eyes adapt to the dim lighting. This is a two edged sword; if the need arises to shine your weapon light, you will wash out the reticle at a low power setting. Hence why you need to find a reticle with bold designs which add tons of contrast such as (drum roll please)… The German #4.
Optics with a center dot such as the Razor HDII and the Leupold Firedot operate on a different mechanism, and there is no light spill out the front with those two models. These are excellent choices for a defensive carbine. Go ahead and check your variable. Turn it on and go in a dark closet. Is light spilling out the front? Bingo. Better hope your opponent doesn’t have NVG’s.
The Razor HD II does not feature light bleed out the front of the optic due to its rearward facing fiber optic illumination.
Magnification Brightness Booster TURBO MODE:
Another point to consider is your magnification setting. As you twist the magnification ring, you increase or decrease the size of the exit pupil. Ideally we want that nice 7-8mm exit pupil so the image output matches our night adapted pupil. Most shooters don’t know that the image will brighten up to a point and then decrease once you pass the magic 7-8mm exit pupil.
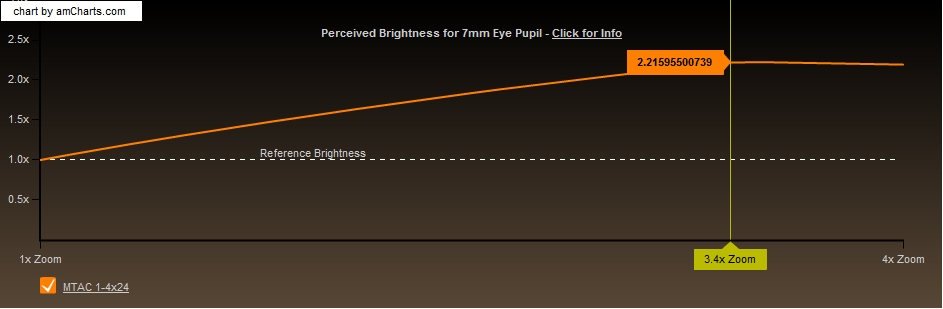
As you turn the magnification up, the light is focused to match the diameter of your night adapted pupil. Typical 1 -4x and 1-6x variables are most efficient at 3-3.5x magnification.
As you twist the magnification ring, you are decreasing the size of the exit pupil. Again with the Razor as an example: At 3.5x, the razor HD II has a 7mm exit pupil. At 6x it has a 4mm exit pupil. Since I want the image to match my pupil diameter, I want to leave my razor on 3.5x for the best low light performance. A moot point indoors, but outside switch over to 3.5x and give your low light vision a boost.
Wrapping Up:
Using your equipment to its maximum capability in low light is a simple matter of understanding how the optic funnels light to your eye, and recognizing some of the pitfalls that illuminated optics have. The best choice for a low light optic is something along the lines of a simple 4×32 ACOG. It has a large objective in for lots of light gathering goodness and funnels that down to a 8mm exit pupil so its set up pretty good for low light shooting. Since more shooters are rocking a variable these days, your best bet is to understand it IN AND OUT. A 24mm variable optic isn’t the best optic for low light, but it will brighten the image if you understand how to use it.
I hope you can make use of this knowledge when Z day comes.
May your shots find their mark even in the dark.
Good Luck.


Good, useful article. Thanks!
Glad to see you joined us on Gab, too.
An older article, but adding a offset red dot sight would definitely help in low-light scenarios. Depending on the mount, it will give the shooter a more “head’s-up” position for better situational awareness. If one has a kill flash/honeycomb attached, that can mitigate the LED spill from the RDS, or one can use a flip-up cover on the RDS technique as well.
Personally, I’ve found that most low-mid range dollar LPVO’s are about 1.1x. They’re great outdoors but you get what you pay for. So a RDS for niche CQB applications, from 7 yards-25 yards, will do the job better especially if a target starts to move erratically quickly.