What we face is an unprecedented loss of rights. The election looms and everyone is worried. Why wouldn’t we be? The media are showing a direct and focused slant in collaboration with the democrat establishment, and it seems that George Soros is tied to several brands of voting machines which further represents a yet another conflict of interest. These same voting machines were under scrutiny (smartmatic) in the Venezuelan election yet the media ignores these issues in the good ol’ US of A.
We face a loss of rights… not in a fair fight, but a fight that is increasingly unfair and takes advantage of us while we attempt to play fair. When we are reduced in our capacity as a nation to express our views on the soap box, when we are reduced in our ability to cast our votes for our chosen candidate at the ballot box, we are left with just our cartridge box. Reflect on that.
The purpose of this article is to bring the new shooter up to speed on setting up their carbine out-of-the-box and given him/her some tips on practical marksmanship. We will have an unprecedented fire sale on AR15s should Hillary (Killary?) be elected. We need to make these new shooters capable riflemen. A rifleman with confidence in his/her rifle is a powerful person indeed. A rifleman with ten friends is a force to be feared.
The Carbine:
The AR15 carbine is an effective tool limited only by the knowledge of the owner. There are millions of these carbines distributed among the people in various configurations. What is not so well-distributed is a standard course of marksmanship. How can there be a teachable standard when we are dispersed and do not collect for annual training or weapon familiarization? How can we become a nation of rifleman when no “standards” exist?

The ubiquitous Ruger AR556 is a good example of an “average” AR15 carbine.
In order to make this as simple as possible, this article will attempt to explain topics and methods that are efficient and useful regardless of the carbine’s configuration. So what is the average carbine configuration? The “average AR15 carbine” in the citizenry’s hands is likely to be a 16 inch gun equipped with irons or a red dot. From here we will base our discussion to its proper use. This article makes no attempt to discuss marksmanship fundamentals, as that is a whole ‘nother article; instead we focus on the proper setup and use of your carbine as a defensive tool for an uncertain future.
Setting Up Your Carbine:
The 16 inch gun is a versatile piece of equipment. We don’t need to overhaul your carbine and if your budget does not permit you to upgrade, please run what you have. The carbine will need certain essentials and these will include a light, quality magazines, and properly set up optics or irons.
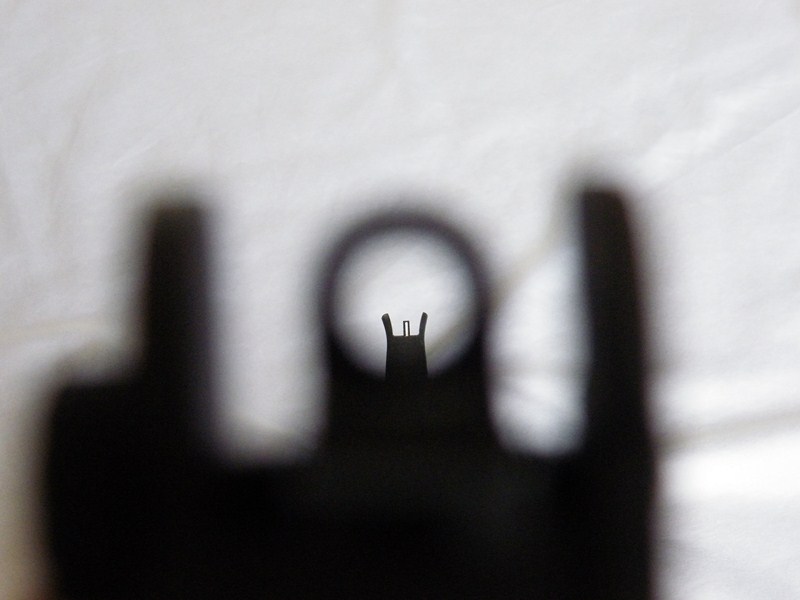
Ignore the rear sight when using the small peep, and focus on the front sight. Your sights should be as far apart as possible and the rear as close to the eye as possible. Doing this will give you greater depth of field. If you are using irons, read this article for a better understanding of iron sights. Opens in new window.
Irons: There is a simple rule for irons: Keep the front and rear sight as far apart as possible, and keep the rear peep as close to your eye as possible. A long sight radius increases your depth of field and helps reduce eye fatigue. The closer the front sight (which is your focal point) to your eyeball, the fuzzier your target will be. Please click the link below the above photo to learn about irons if this will be your primary sighting mechanism. We have covered a LOT of material in the last few years about iron sights.
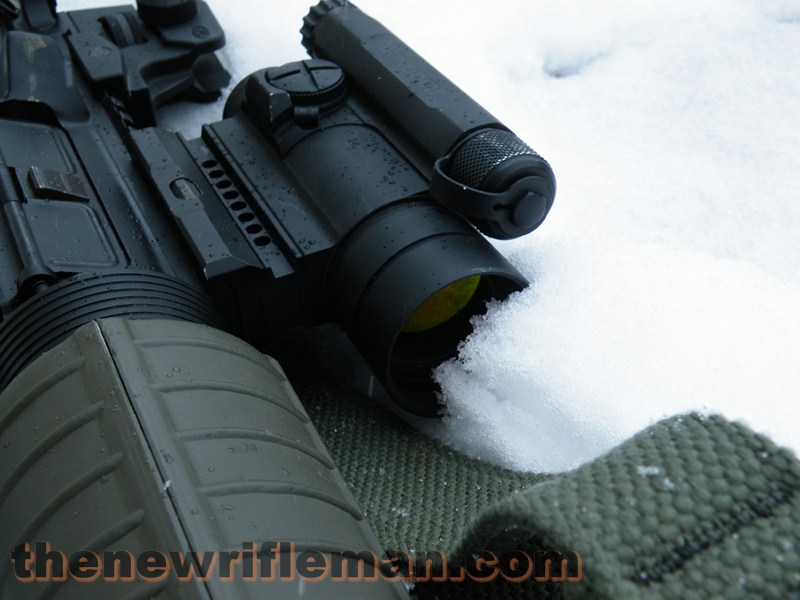
Red dots are superior in every way to irons sights… unless you have bad astigmatism. Excellent in bright or low light, no eye strain, a target focus, both eyes open shooting, easier holdovers, obscures the target less. Should I go on?
Red dot: If you can afford the upgrade, please consider a red dot. The march of technology will keep going forward, and your enemies will likely be equipped with modern sighting systems. The red dot gives you a sharp point of aim and does not strain the eye in the same way irons do. A quality dot will have several thousand hours battery life, and can be found from $150 to $700. Primary arms MD-ADS for example has 50k hours battery life and runs at $169. Consider DI Optical RV1 at $229 for a mil spec Korean optic. I have a RV1 on order for T&E. If you have the cash, go Aimpoint. Consider adding AA, or AAA lithium batteries to your red dot for power. You will need a long battery life and lithium batteries don’t leak acid so that’s a huge bonus.
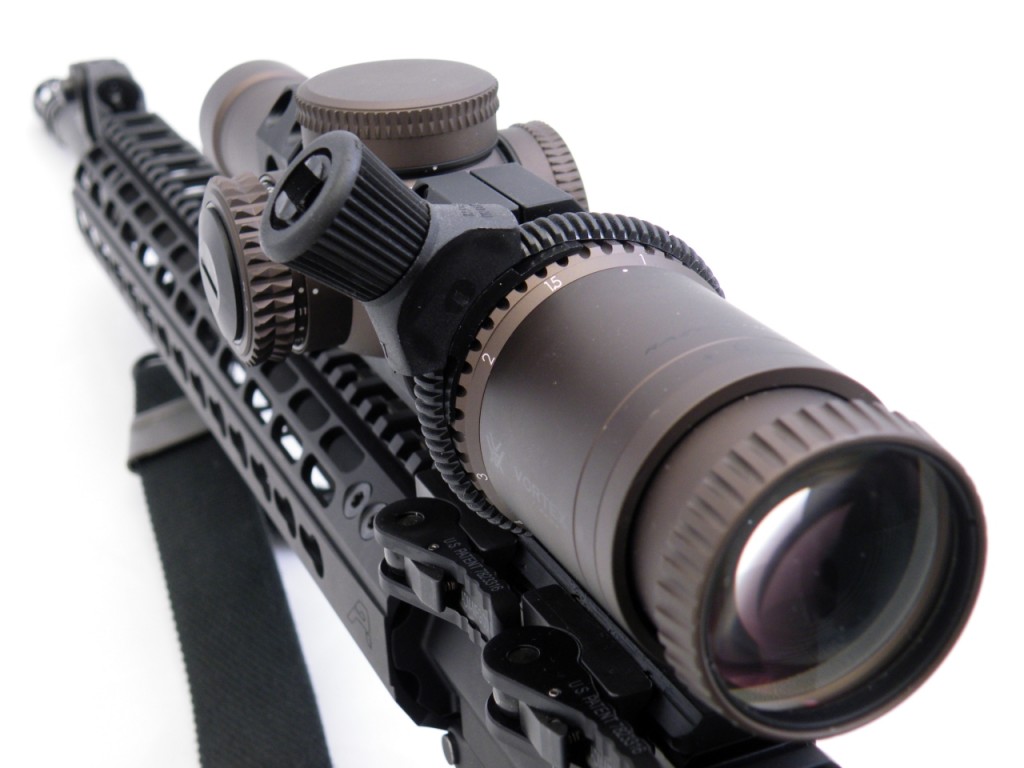
Easier target identification, the ability to precisely aim over longer distances while concealed, and better low light capability are some of the advantages a variable optic can offer the prepared citizen… the cost is weight and bulk.
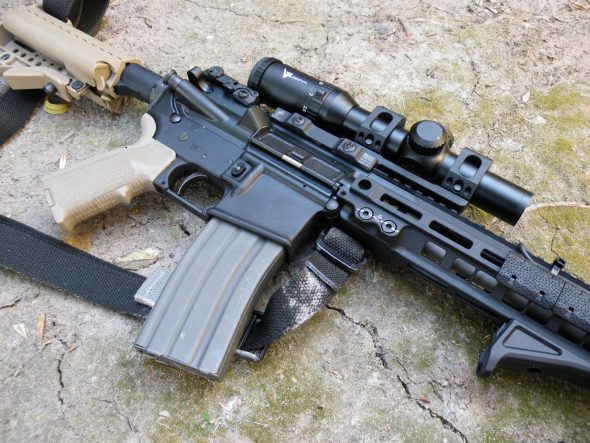
Optics: Consider variable optics for shooters who don’t mind the weight penalty. A variable will give you the ability to ID a target and successfully fire upon them from extended distances. A marksman equipped with a variable and a carbine can wreak havoc on a force who is unaware of your position. Being able to ID a target permits you to advise your team if the target is a friend or foe. Furthermore, the optics will boost low light visibility in dim conditions. A quality variable is the “holy grail” of utility.
Light and Sling: Your carbine needs an optic, as above, a light, and a sling. Without those three essentials, you are likely to encounter situations where you cannot effectively use your carbine. Can you see in the dark or dusk? Light. Can you give aid or pull out your pistol without dropping your carbine on the floor? Sling. There are a variety of slings available, and at the very least I would suggest a two point sling set up to hang your rifle at the low ready. It doesn’t have to be fancy. The cheapest nylon sling can be used at the low ready with most telescoping stocks having a sling mount, and many rails offer a QD swivel. Use it. Use paracord if need be.
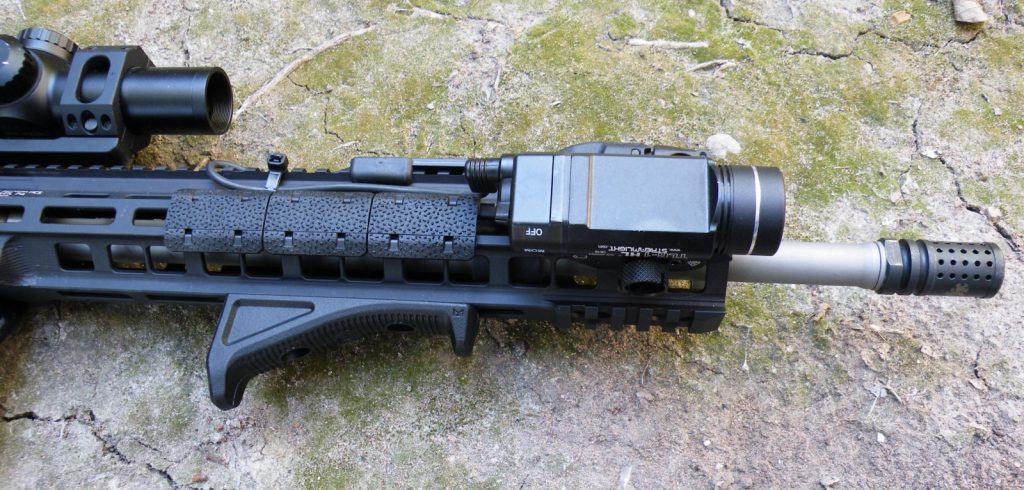
A TLR-HL rifle kit on the author’s carbine
Lights come in various configurations. I use TLR series because they are well vetted and cost-effective. A light should be considered essential, but with the light comes the need for more training. At the very least, anyone can use a light for target ID and that is essential in low light to make sure you know what you are shooting at.
Magazines: You will get no where fast without good magazines and a means to carry them. I like Gen 3 Pmags (who doesn’t?) as they have certain features which I find desirable. More on that later. Get good magazines, and get enough of them to last you a while. A belt and mag pouch wouldn’t hurt either.
So now that we have covered the basics, what is our first point of discussion?
The Zero:
The carbine can be employed with a great degree of practical accuracy on a target. Many shooters will zero at 100 yards and be done with it. While perfectly effective for home defense and intermediate range shooting, we can improve upon the 100 yard zero by moving to a zero at 50 yards. Informed shooters will zero at this distance due to the flat trajectory out to 200-225 yards. It is at this distance that most carbine shooters should zero their irons, red dots, and variable optics. With an average rise of 1.5 to 2 inches over your line of sight depending on the loading, the zero will allow us to shoot point targets out to 200 yards without need for holdover.
The 300 meter military zero, while effective, will require hold under for small targets at 200 yards. The 50 yard (and/or a 200 yard) zero will cover your shooting for most scenarios and situations at point-blank and out to 200 yards before hold over is required. Head shots out to 200 yards are done without concern for drop or hold under.
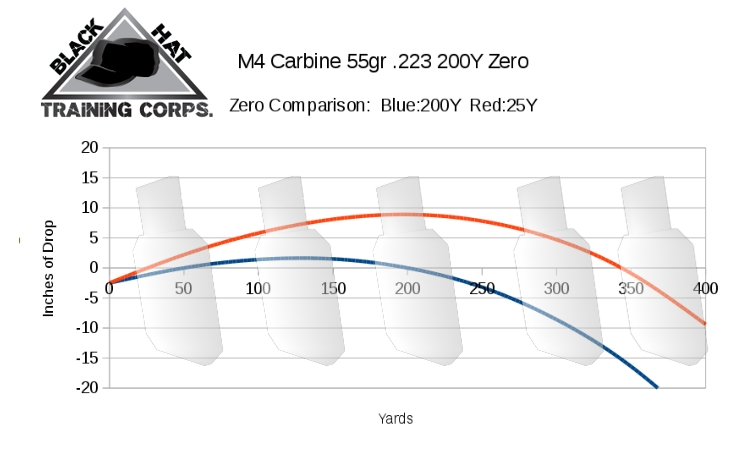
Photo courtesy of Black Hat Training Corps.
Again, this is not new or earth shattering information, but if you are just starting to prep and spec your gear and carbine for the times ahead, this should be considered a versatile and effective zero for both irons, optics, and red dots.
Using your zero: close through intermediate ranges:
With the large variety of equipment available to the American patriot, the ability to standardize based on a specific sight type, scope reticle design, or iron sight setup will be both a waste of time. The patriot next to you in the ditch may have any number of optic setups, or perhaps (s)he is still running irons. In this section of our discussion, we will examine the proper method to train shooters who may present with a variety of sighting products and setups which do not lend themselves to standardization. These shooters may not all have optics with a BDC, and the wide variety of barrel lengths, ammo types… so instead of standardizing on equipment, we instead use the target for standardization… and in this case the human silhouette is a great starting point.
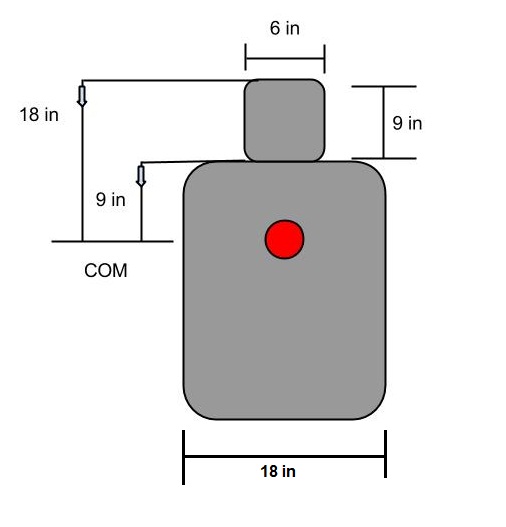
The average height, head and shoulder width of a target makes an excellent reference for bullet drop and wind holds that can be standardized across multiple carbine setups.
Shooters who have successfully developed skill with their rifle at point targets out to 200 yards will be ready to shoot against targets at 300 and 400 yards with this method. The human body has many built-in reference points and these points will become our method of compensating for bullet drop. Since the human body can be big or small, we will use the average sized male in the form of the easy to obtain B27 target.
With the 200 yard zero, these holds will continue to work for a variety of loadings ranging from 55 grain to 75 grain bullets.
Our first hold is the dead hold. Here we aim point of aim point of impact. Inside of 200 yards, we aim for what we wish to hit. If your target is wearing armor, consider the pelvis or the head as a point target. A shot to the pelvic region is a mobility killer and requires immediate medical attention. Direct compression of the large arteries present in the pelvic region is not always possible and tourniquets will not be effective at stopping bleeding, so expect this to force opposition to engage in medical action of the individual shot here.
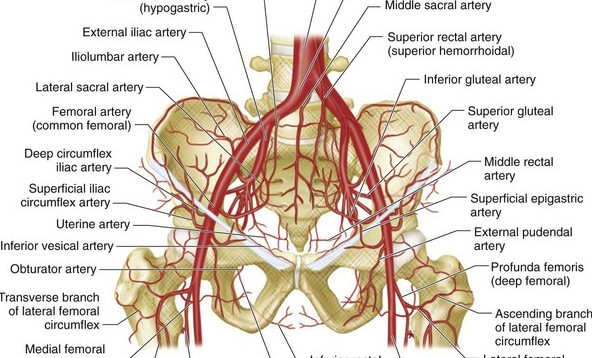
The pevlic girdle may not put the opposition down, but it can immobilize and force medical attention to the individual who was shot.
If armor is of no concern, or if simply aiming for the center of mass, aim for the chest.
The face represents an easy to remember point of aim for targets at around 300 yards. If your target is at an estimated 300 yards, aim for the face. This will allow the bullet to drop into the mid to upper chest depending on the loading. The 50 yard zero in conjunction with this hold will allow effective fire out to 300 yards on a man-sized target.
If the target is at an estimated 400 yards, aim to “knock the hat off” the top of the head. This represents an easy to visualize point of aim for targets at 400 yards. Depending on loading, this hold will allow rounds to hit the mid chest to lower abdomen.
In Summary: The chest, the head, the hat are your reference points for 0-200, 300, and 400 yard shooting.
Ergo these three human landmarks, the chest, the head, and the hat, represent repeatable holds for the carbine equipped rifleman and will increase your effective range out to 400 yards on a full-sized silhouette. The only consideration for the rifleman target identification and wind. Ensure someone has a means to properly ID who or what you are shooting at. This individual can also estimate range if his/her optic is equipped with a rangefinder. To combat wind, we will also use a simplified method. We will touch on that next.
An Easier Way to Visualize Wind Holds:
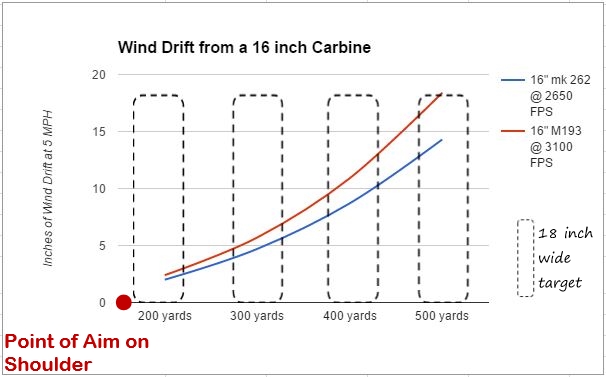
Note that even though the bullet is being pushed off target by light wind, it has 18 inches of drift on a shoulder width target where it will still score a hit. Mk262 is a 77 grain bullet, and M193 is a 55 grain bullet. This represents an overhead view of a 18 inch wide target.
The average man-sized target is 18 inches shoulder to shoulder. Think of that as 18 inches of wiggle room for wind to push your bullet. Puts it into perspective doesn’t it? For 0-200 yard targets, no changes in hold are necessary, as light wind just isn’t strong enough to worry about. Out to 200 yards, continue a dead hold. For 5-10mph wind, hold just over the shoulder at 300 yards and over to the right of the shoulder at 400 yards.
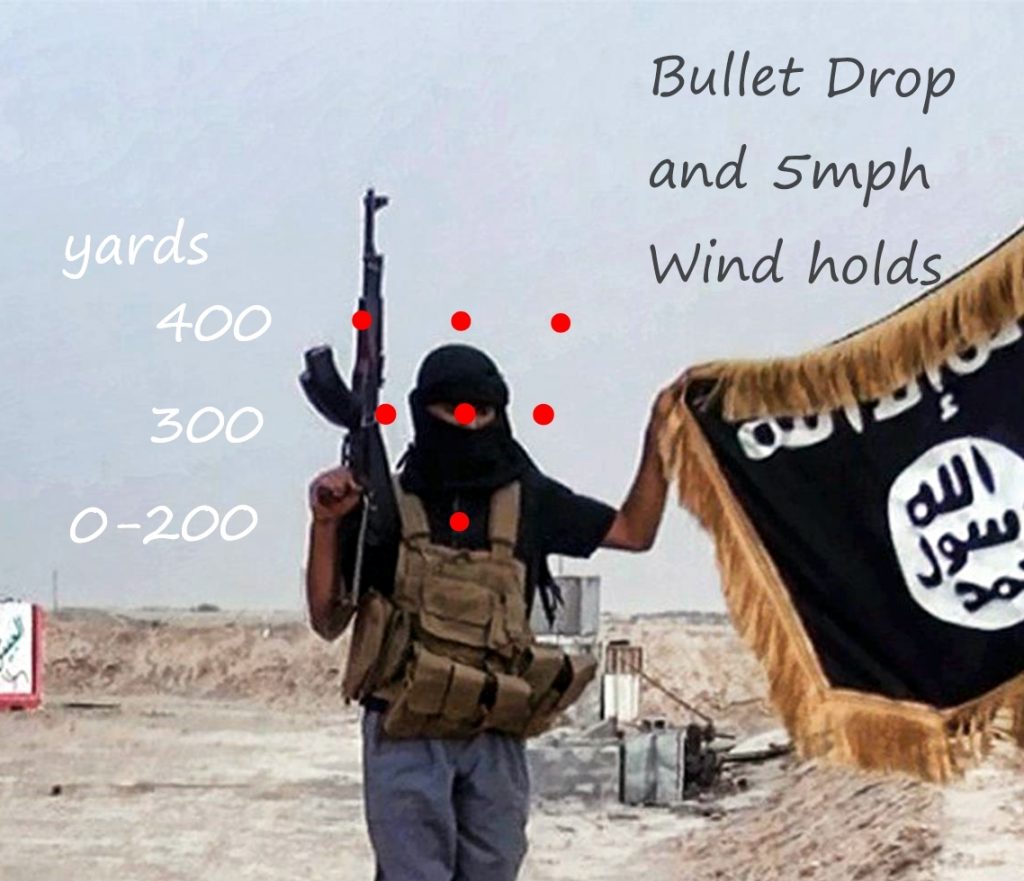
The chest, the head, and the hat are your basic holds for bullet drop compensation. This technique can be applied easily with a 2 to 4 MOA red dot. The V portion of the holds are for wind and holds above the shoulder (300 yards) and then just outside the shoulder (400 yards) will dope the wind and drop with most loadings.
The truth is that if the target is facing you at distances up to 400 yards, we just need to use common reference points on the body to help us correct wind drift. In a practical sense here is a series of holds to visualize both bullet drop and elevation.
So think of your holds as a V for wind, with the chest being the lowest point of aim on the V, just above the shoulders at head level being the next point, and then up and past the shoulders at hat level as the last hold for 400 yard shooting in light wind; simply aim to knock off the hat and then move the reticle over and just past the edge of the shoulder.
These holds are “generic” and should work for most setups and loadings. Remember a 5mph wind rustles leaves, and at around 10 mph small twigs and small branches move with the wind. These generic holds don’t require a scientific estimation of wind speed, simply employing them will increase the probability of a hit vs. someone who has no idea where to hold for wind and drop. What else can we do if we don’t know just how far they are?
A Rifleman’s Pair: If you are shooting from a stable position, such as prone, consider a controlled pair when the target is at an unknown range. Say the target appears somewhere between 200 and 350 yards, you have just a moment to take the shot… What is your course of action? Shoot one round at the chest, bring the reticle up to the face, and fire your second shot. A rifleman’s pair will cover your error in regards to the targets distance, but must be done quickly. So what if you didn’t call that target at exactly 273 yards? A controlled pair will increase your likelihood of a hit on the target. Modern compensators along with a quality trigger and a solid shooting position can aid in this technique. Compensators will cut recoil and muzzle bounce, lending more control to the shooter, and a rock steady position will further enhance control.
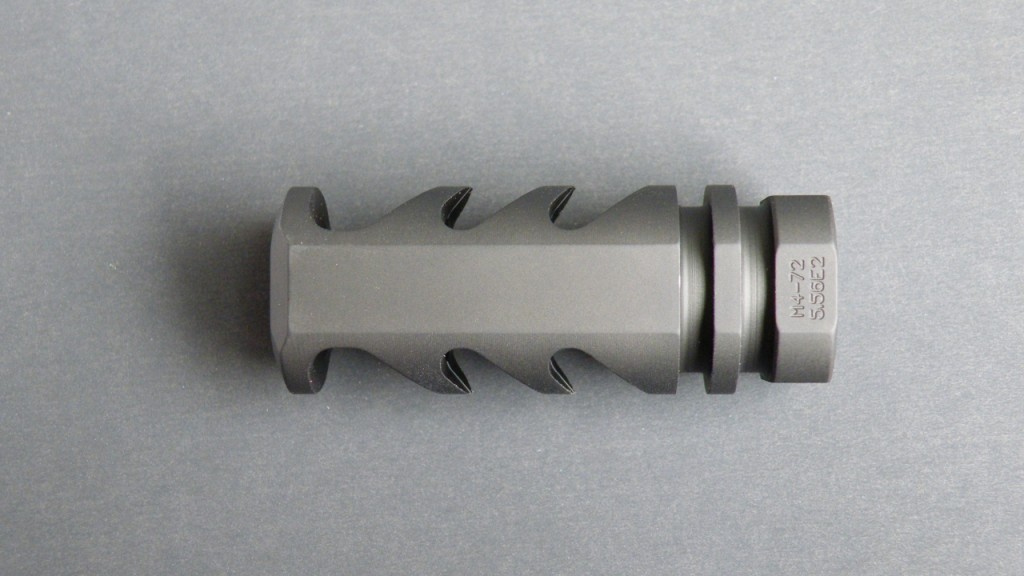
Compensators offer an effective means to control shot recovery, allowing easier execution of a pair of controlled shots to cover error in distance judgement. This M4-72 is an aggressive example and reduced carbine recoil to near that of a 22LR. Seriously. It is rather gassy though.
Steadying Your Carbine:
Even though the chest, head, and the hat are simple holds, it is important to employ means to steady the carbine in a manner that facilitates rapid target acquisition. The traditional methods of “slinging up” are not useful outside of perhaps hunting and the target range. Instead, we should employ techniques that rapidly steady the carbine to permit solid shooting.
Standing:
Standing is more of a practice makes perfect skill. Clear your carbine and practice presenting the carbine, aligning the reticle, and dry fire at a small target placed on the wall. Do this hundreds of times over the course of the year. Muscle memory and a smooth presentation and smooth trigger pull will do great things for your ability to hit a 100-200 yard target from a standing position without relying on barriers. Practice at home, and practice at the range.
Magazine Monopod Prone:
The magazine is an excellent monopod, particularly Gen 3 pmags. The Pmags have an over-insertion lip that guards against the magazine being fed too far into the magazine well and touching the bolt carrier with the feed lips. When in prone, the magazine is used as a monopod and acts as a bridge between your rifle and the ground, with your forearms, elbows, and face on the stock completing the structure. This method produces rock solid stability. As good as this setup is, there are still people who will say it may cause reliability issues. How? When a magazine or gun is out of spec, the possibility of the magazine feed lips scraping the bolt carrier when pressure is applied upward to the mag is a possibility. Most of the weight of magazine monopod prone is carried by the magazine catch and the notch where the catch rests in the magazine.
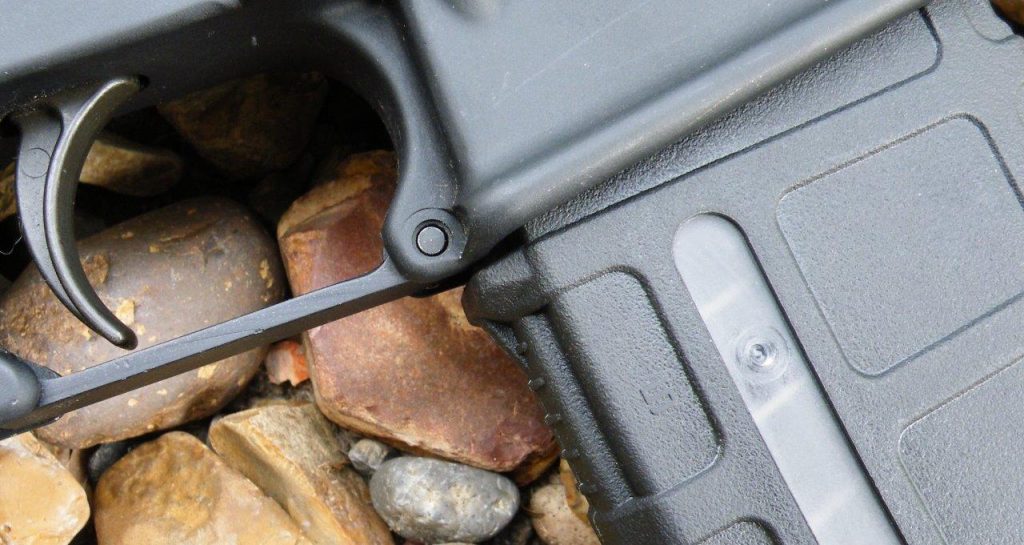
The lip on the back of Gen 3 Pmags helps prevent over-insertion and this makes them a great magazine for mag monopod shooting without reliability issues.
New, quality magazines, or Gen 3 Pmags will guard you from reliability issues in MM prone so long as your gun is in spec. Again I like PMAG gen 3 because of the lip at the back of the magazine that prevents over insertion of the magazine. I cannot fathom a faster, more stable position than MM prone. Try it out at your next range trip.
Magazine Kneeling:
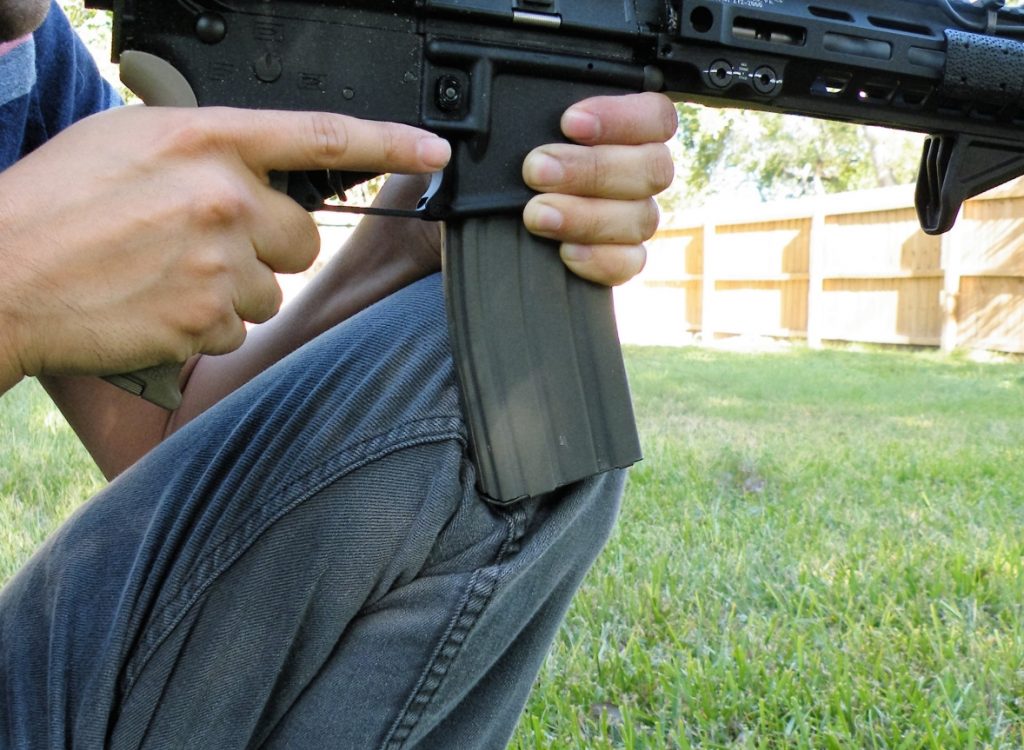
The magazine is pulled against the knee for quick rifle stabilization. There are a number of variations to this technique, and if you find a faster kneeling position, by all means use it.
This technique is a simple method of carbine stabilization from a kneeling position. Any number of variations exist on this regarding placement of the foot and lead leg, but I like to sit on my right foot for a lower profile and my left leg leads. The carbine is positioned so that the magazine acts as a stabilization aid by being pressed against the inside of the knee while the forearm is pressed on the other side of the knee. In doing so, you will find that the magazine again lends a helping hand in steadying the rifle in a field expedient, rapid manner.
Quality Ammunition:

Quality ammo is a great asset. If you haven’t started reloading, now is a great time to do so to keep yourself occupied during winter seasons.
We cannot forget the importance that quality ammunition has. While 1000 rounds of Wolf are better than nothing at all, consider stocking up on 69-77 grain bullets as can be budgeted. These projectiles have a higher ballistic coefficient than 55 or 62 grain bullets, and this gives them an edge with wind. While a gust of wind between buildings may push the 55 grain off target with an above the shoulder hold, the 77 grain bullet may resist the wind enough to stay on target, and it could mean the difference between a hit and a miss.
That’s not mentioning the devastating properties of 69-77 grain .223 bullets.
Wrapping Up:
There is only so much an article like this can accomplish. My hope is that it adds some value to your shooting, and at the very least offers something new for you to add to your current skill set. The basic carbine is well emplaced in the good hands of the citizenry. What is next is the will and confidence to use it should such dark days come. What we want is the citizenry to outclass and outpace the abilities of those who would oppose our collective will. If this post has any value to you or your friends in the shooting community, please share it. It is important that we create a nation of solid shooters. The world is not a nice place, and it is getting darker. Our collective will to resist evil must be sharpened to a cutting edge. Take what is useful, discard what is not, and keep learning.
Who amongst our oppressors does not fear a Rifleman?




excellent post.
Who amongst our oppressors does not fear a rifleman. Most excellent
This needs to be required reading when buying an AR-15, and I will direct people here as I see the need.
Good article! A nice ‘back to basics approach that needs to get said. The more I learn, the more I really understand that successful marksmanship is not magic, but the excellent execution of the fundamentals.
Everyone needs to go to a couple-three Appleseed clinics.
A master-class highpower competitor once said to me: “A champion shooter once told me, “Good shooting is good execution of the fundamentals. Great shooting is great execution of the fundamentals”.”
That, and really understanding your equipment, is a powerful combination.
The election results may present an opportunity to foster more of a “marksmanship culture” in this country, like in Switzerland. I wonder if such things as regular matches and clinics can be set up in the “red counties” and be heavily publicized, with the goal of it becoming a cultural standard. Between the Appleseed Project and the Civilian Marksmanship Program, such may be possible. It would give the lefties fits.
That would be a dream come true!
Really looking forward to your review and impressions of the DI Optical red dot.
I’ve been looking at it for a year + but have found no real reviews and long term tests. We need one. I realize the glam is all in the mini dot world these days, which may explain that. Also, their US rep (seen in the one or two shot show videos) doesn’t exactly make one think DI Optical is an international mil spec contractor (IMHO).
Anyway, the RV-1/2 seems to be exactly the kind of everyman’s battle ready red dot (from a real mil spec company) you have written about elsewhere …at everyman prices.
Ask and you shall receive.
I’m enjoying this article… however- on the comment under the picture “Red dots are superior in every way to irons sights… unless you have bad astigmatism.” It’s also true that Iron sights are much superior in battery life considering on many of those persons buying a “good example of an ‘average’ AR15 carbine”… “The ubiquitous Ruger AR556” or (I would also add the M&P 15 Sport) are also going to go with a “budget” red dot maybe in the $50-$100 range. Irons don’t run out of batteries ever even when rifle sits in the safe and gets handed down to a grand kid… The irons will still work, (probably won’t) corrode or just quit working (no idea how some low end polymer or aluminum sights will fair in 50 years… but the theory still holds. Just a thought.
Go w/ a prism red dot like the Vortex Spitfires! Work much better for me. More weight but larger field of view and engraved reticle is always there even if off or battery dies, albeit in black rather than red.